Quick Start
This is a quick walk-through of the basics using KeeAgent.
Add a new entry to your database (Edit > Add Entry…).
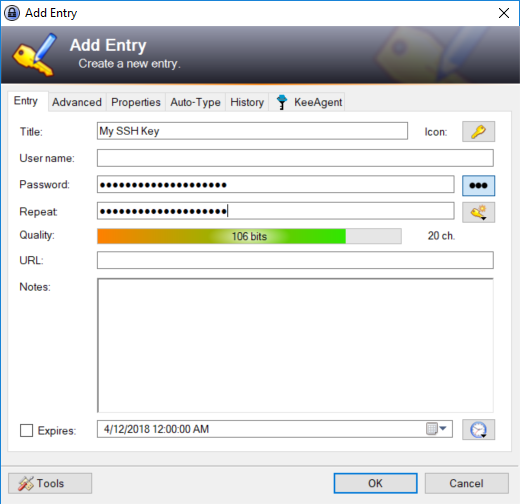
On the Entry tab, give the entry a title.
Enter the passphrase for the SSH key you are going to use in the Password field. The plugin needs this to decrypt the file. Leave the Password field blank if the key is not encrypted.
Tip
The remaining fields in the Entry, such as User name and URL, are not used by KeeAgent and can be left blank or used for anything you want.
Todo
Add new tip about use of URL field by KeeAgent.
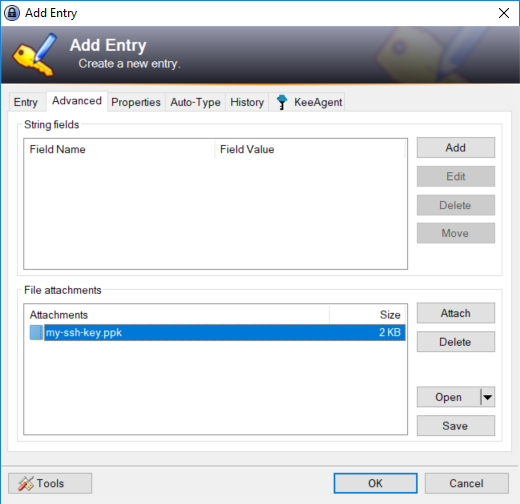
On the Advanced tab, attach your private key file using the Attach button. Select the key using the file dialog. This can be a PuTTY private key file (.ppk) or an OpenSSH private key file. After you have selected key and clicked OK, the file will appear in the list of attachments.
On the KeeAgent tab, check the box that says Allow KeeAgent to use this entry.
In the Location group, the file that you just attached should be automatically selected as the Attachment. Verify that this happened. If you have more than one attachment, you may have to select the correct file.
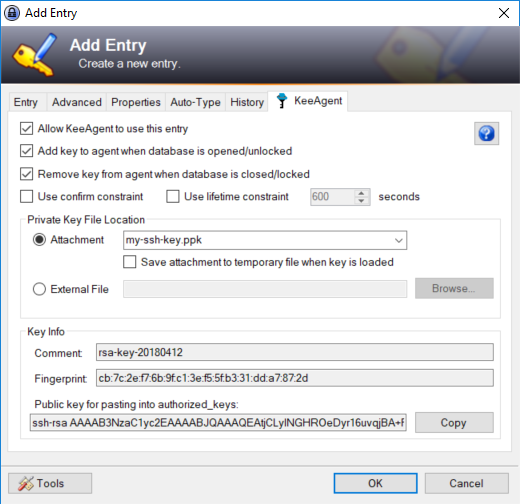
Click OK to save the entry and close the Edit Entry dialog.
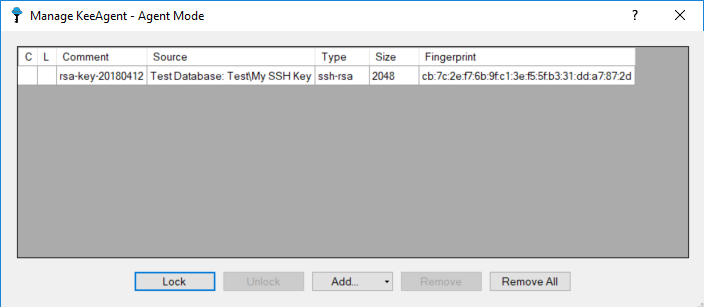
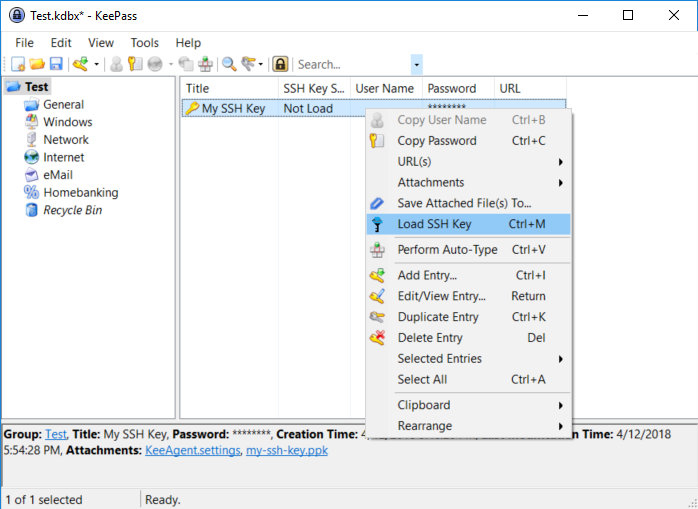
Right-click on the new entry and select Load SSH Key. The key is now loaded into the agent and can be used by client programs such as PuTTY.
Click on Tools > KeeAgent. This displays a list of currently loaded keys and allows you to add or remove keys.
